

Setup OpenGL with Visual Studio 2017 on Windows 10
Introduction
Open Graphics Library is a cross-language, cross-platform application programming interface for rendering 2D and 3D vector graphics. The API is typically used to interact with a graphics processing unit, to achieve hardware-accelerated rendering.
Pre-requisites
To execute your graphics applications written using OpenGL libraries, you can use Visual Studio.
Microsoft Visual Studio is an integrated development environment (IDE) from Microsoft. It is used to develop computer programs, as well as websites, web apps, web services and mobile apps.
Install Visual Studio Community 2017 using the official installer with the required components as shown in the image below.

Installation
-
Download GLUT header, lib, and dll files from OpenGL. (Mentioned on this page)
-
Paste
glut.hinC:\Program Files (x86)\Microsoft Visual Studio\2017\Community\VC\Tools\MSVC\{14.16.27023}\include\GL.Create the GL folder if not present already. The {version} may differ on your system.
-
Paste
glut.libinC:\Program Files (x86)\Microsoft Visual Studio\2017\Community\VC\Tools\MSVC\{14.16.27023}\lib\x64.Paste
glut32.libinC:\Program Files (x86)\Microsoft Visual Studio\2017\Community\VC\Tools\MSVC\{14.16.27023}\lib\x86.The {version} may differ on your system. -
Paste
glut.dllandglut32.dllinC:\Windows\SysWOW64.Copy
glut32.dlltoC:\Windows\System32also. -
Open your
Windows Console Applicationproject inVisual Studio, or create a new one:File > New > Project
Visual C++ > Windows Desktop > Windows Console Application
-
Go to
Project > Properties.Select
All ConfigurationfromConfigurationdropdown menu on top left corner.Select
Configuration Properties > C/C++ > Precompiled headersand changePrecompiled Headeroption’s value toNot Using Precompiled Headers.Select
Configuration Properties > Linker > Input. Now right click onAdditional Dependenciesfound on right panel and click Edit.Now type:
opengl32.lib glu32.lib glut32.lib(Note: Each .lib in new line)
-
That’s it. You have successfully installed OpenGL. Go on and run your program.
Same installation instructions apply to freeglut files with the header files in the GL folder, lib in the lib folder, and dll in the System32 folder.
Check your installation
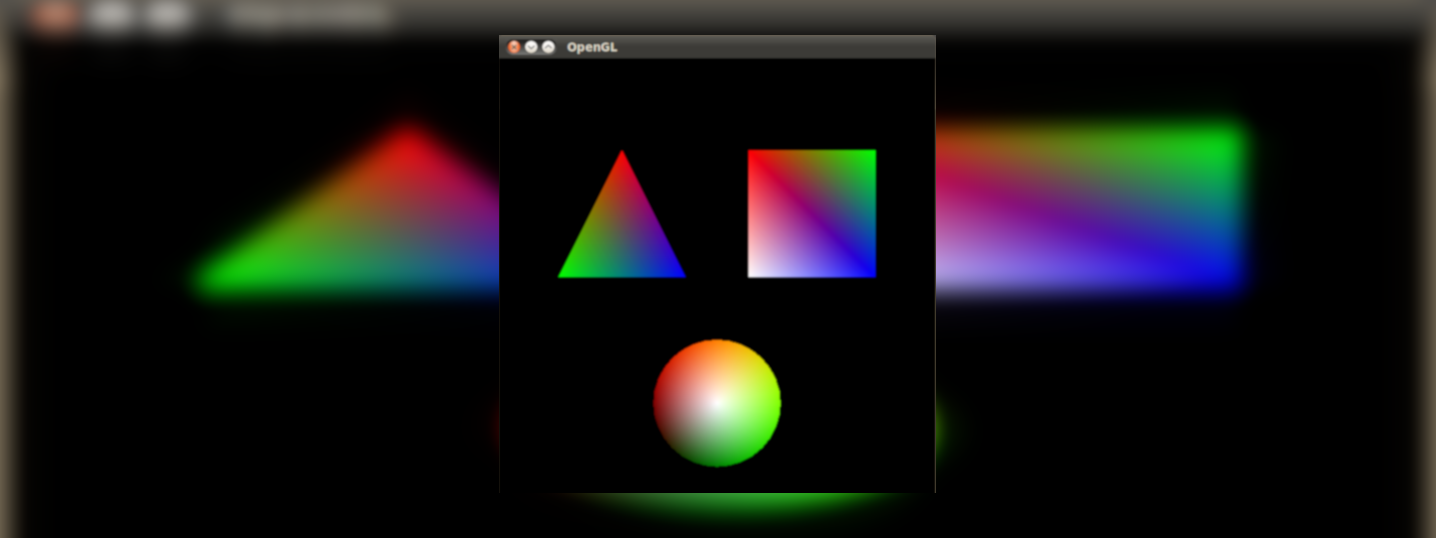
You can check your installation by running a simple C++ OpenGL program to draw points on a 2D canvas.
You’ll get the following output:

Contribute
This website is open source. ![]()
Improve this page


Leave a comment